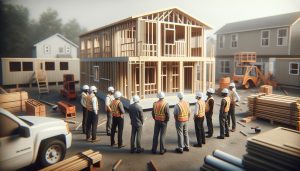
When it comes to maintaining a trailer home, one critical aspect that often goes overlooked is the subfloor. Over time, moisture damage, wear and tear, or poor installation can lead to serious issues that compromise the integrity and safety of your living space. Replacing the subfloor is not only essential for preserving your home’s structural soundness, but it also enhances your comfort and overall property value. Whether you’re dealing with soft spots, water damage, or simply want to upgrade your flooring, this DIY guide will empower you with the knowledge and step-by-step instructions to tackle subfloor replacement confidently. By investing a little time and effort, you can safeguard your mobile home against future problems while creating a sturdy foundation for whatever gorgeous flooring you choose to install next. Let’s dive into the process and transform your living space!
Understanding the Importance of Subfloor Integrity in Trailer Homes

Understanding the integrity of the subfloor is crucial for ensuring the overall safety and comfort of a trailer home. Often overlooked, the subfloor acts as a foundational layer that supports the floors we walk on daily. A compromised subfloor can lead to a host of issues, including structural instability, moisture problems, and costly repairs. For instance, if water seeps through cracks or gaps, it may lead to mold growth, which not only impacts the air quality but can also pose serious health risks to occupants.
Regular inspections and maintenance are key components in preserving subfloor integrity. Homeowners should be familiar with the materials used in their trailer home’s construction, as this knowledge will guide them in identifying potential weaknesses. Common signs of subfloor issues include creaking floors, visible sagging, and the presence of water stains. Ignoring these early warnings can result in more extensive damage that requires complete subfloor replacement.
Investing in high-quality materials during repairs or replacements can pay off in the long run. For instance, choosing marine-grade plywood instead of regular plywood provides better resistance to moisture, ensuring that your subfloor lasts longer in situations where water exposure is a concern. Additionally, employing proper sealing techniques will aid in creating a more durable barrier against future moisture issues.
In conclusion, maintaining subfloor integrity is not just about a comfortable living space; it’s about safeguarding the entire structure of a trailer home. With proactive measures, appropriate materials, and timely repairs, homeowners can enhance their living environment and prevent costly repairs down the line.
Diagnosing Subfloor Damage: Signs You Shouldn’t Ignore
Identifying subfloor damage early can prevent significant issues and costly repairs down the line. Many homeowners underestimate the critical role the subfloor plays in the overall structure of a trailer home. Being vigilant and recognizing warning signs-such as unusual sounds or visual cues-can make all the difference in maintaining a safe and comfortable living environment.
Among the most noticeable indicators of a compromised subfloor are sounds like creaking or popping when walking across the floor. These noises often suggest underlying issues, such as loose or damaged floorboards, which could ultimately be linked to serious subfloor deterioration. Additionally, if you notice visible sagging areas or sections that feel bouncy underfoot, it’s a sign that the structural support might be failing.
Water stains and discoloration are another red flag to watch for. This often suggests that moisture is penetrating the subfloor, potentially leading to rot or mold growth. Stains near plumbing fixtures or in areas with poor drainage should be investigated promptly. If you detect a damp or musty odor, it may indicate mold development, which poses health risks-especially in enclosed spaces typical of manufactured homes.
It’s equally important to be proactive about checking the insulation under the subfloor. Insulation that appears damp or has mold can drastically affect not just the subfloor, but also the overall thermal efficiency of the home. Pay attention to any fluctuations in your heating or cooling bills, as unexplained increases can hint at issues beneath the surface.
By remaining vigilant and addressing these warning signs promptly, homeowners can avoid more significant repairs and uphold the integrity of their trailer home. Regular inspections combined with timely maintenance will ensure a safe and durable living environment, reinforcing the value of proactive care in mobile home ownership.
Essential Tools and Materials for Subfloor Replacement
To successfully replace the subfloor in your trailer home, gathering the right tools and materials is essential. Not only does this preparation facilitate a smoother workflow, but it also ensures that you have everything you need at your fingertips, minimizing delays and frustrations. For this DIY project, a mix of basic and specialized equipment will help you tackle subfloor replacement efficiently and effectively.
Essential Tools
To begin, you’ll require several key tools that will aid in both the removal of the old subfloor and the installation of the new materials:
- Reciprocating Saw: Ideal for cutting through old subflooring and framing, this tool makes the job significantly easier.
- Circular Saw: Perfect for making straight cuts in new plywood or particleboard.
- Drill/Driver: A cordless drill with a variety of bits is crucial for fastening screws into the subfloor and other structural components.
- Screwdriver Set: Cross and flat-head screwdrivers will help in smaller, more delicate jobs.
- Measuring Tape: Accurate measurements are vital for cutting your subfloor materials correctly.
- Carpenter’s Square: This will help ensure that your cuts are precise and your assemblies are square.
- Safety Gear: Don’t forget your safety goggles, dust mask, and gloves to protect yourself while working.
Materials Required
Once you’ve gathered your tools, the next step is choosing the right materials for your subfloor. The integrity and durability of your new flooring depend heavily on the quality of these components:
- Plywood or OSB (Oriented Strand Board): Typically, 23/32 inch thick plywood is recommended for trailer homes. Ensure that the material is rated for use in wet areas if moisture is a concern.
- Screws: Use corrosion-resistant screws, specifically designed for subfloor applications, for enhanced strength and longevity.
- Construction Adhesive: A high-strength construction adhesive can provide additional bonding between the subfloor and joists, minimizing movement and flex.
- Moisture Barrier: If your trailer is situated in a high-moisture area, consider a moisture barrier to prevent future issues with rot or mildew.
- Insulation Material: Depending on your climate, adding insulation beneath the subfloor can improve thermal efficiency and comfort.
With the right tools and materials assembled, you’re well on your way to undertaking the task of replacing the subfloor in your trailer home. This proactive approach not only enhances your home’s stability but also improves your living environment, ensuring long-term comfort and safety.
Step-by-Step Guide to Removing the Old Subfloor

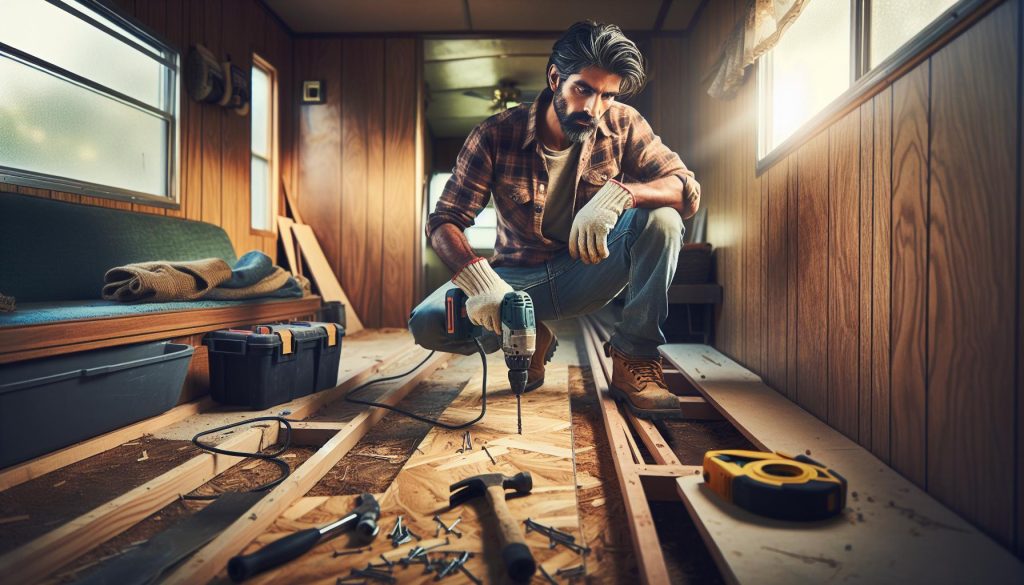
To replace the subfloor in a trailer home effectively, the first critical task is to remove the old subflooring. This process requires careful attention to ensure both safety and efficiency. Start by ensuring that your workspace is clear and that you have all necessary tools at hand. As a precaution, turn off any utilities such as water or electricity that may be affected during the removal process.
Begin by assessing the existing subfloor for any signs of attachment or damage. Use a circular saw or reciprocating saw to carefully cut the subfloor into manageable sections, making sure to cut only through the subfloor and avoiding any framing beneath it. It’s often helpful to identify and mark any joists beforehand, which can guide your cuts and minimize damage. If you encounter nails, prying them out with a pry bar can simplify the removal of planks.
Once you have your sections cut, the next step is to lift the pieces out. Typically, you can do this by inserting a pry bar under the edge of the subfloor and gently lifting it upward. In some cases, the subfloor may be glued as well as nailed, requiring additional effort or tools like a chisel to ensure complete removal.
It’s crucial to take your time during this process to prevent unnecessary damage to the joists or surrounding structures. This careful approach not only preserves the integrity of the trailer home’s framework but also contributes to a more seamless installation of the new subflooring. Using appropriate safety gear, such as gloves and goggles, is essential to protect yourself against splinters and debris. Completing this step thoroughly sets the foundation for a solid new subfloor, helping maintain the long-term stability and safety of your trailer home.
Choosing the Right Subfloor Materials for Trailer Homes

Choosing the right materials for your trailer home’s subfloor is crucial, as it not only supports the weight of everything inside but also plays a significant role in preventing moisture and other issues that can lead to costly repairs. Since trailer homes often face unique challenges, understanding which materials are best suited for your environment is essential.
When selecting materials for your new subfloor, consider the following options:
- Plywood: A traditional choice, plywood is available in various thicknesses and grades. It offers good strength and stability, but ensure you choose pressure-treated plywood designed to resist moisture migration, which can be particularly beneficial in humid environments.
- OSB (Oriented Strand Board): This is often used in mobile homes due to its lightweight nature and affordability. OSB is engineered to be moisture-resistant, making it a reliable choice for areas exposed to damp conditions.
- Particleboard: While this option is generally less expensive, it is not typically recommended for subflooring in trailer homes due to its susceptibility to moisture damage. However, it may be suitable in dry climates or for temporary solutions.
- Concrete Board: For areas prone to extensive moisture, such as bathrooms or kitchens, consider using concrete board. While it is heavier and more labor-intensive, its water-resistant properties can protect against water damage.
In addition to the material type, pay attention to the thickness. Standard subflooring is typically 3/4 inches thick, providing adequate support while minimizing flex. However, if your trailer home experiences higher traffic or heavier loads, opt for thicker materials to enhance stability.
Lastly, when replacing your subfloor, consider installing an underlayment like foam or felt to provide insulation and additional moisture protection. Selecting the right materials ultimately ensures that your trailer remains a comfortable and sturdy living space, allowing you to enjoy the benefits of trailer home living without the stress of continuous repairs.
How to Install New Subflooring Like a Pro

Installing new subflooring in a trailer home can transform the integrity and comfort of your space, ensuring that it withstands the unique challenges of mobile living. With the right approach, you can achieve a professional-looking result that enhances your home’s durability and appeal. The process may seem daunting at first, but by breaking it down into manageable steps, you’ll gain confidence and ensure a sturdy foundation for your flooring.
Start by gathering the necessary tools and materials. Key items include a circular saw, measuring tape, level, safety glasses, gloves, a pry bar, and fasteners appropriate for your chosen subfloor material. Once you have everything on hand, prepare your workspace by clearing the area and ensuring it is free of debris. This will create a safe environment and provide easier access to the subfloor.
Next, remove the old subfloor. Use your pry bar to lift up any damaged sections carefully. It’s essential to take your time here to avoid harming the surrounding structure. Once the old material is removed, check for any signs of damage to the joists beneath; you want to ensure they are sound before proceeding. If you discover any issues, address them by reinforcing or replacing the joists as needed. This will prevent future problems with the new subfloor installation.
Once the surface is clean and the underlying structure is sound, it’s time to measure and cut your new subfloor material. Ensure accurate measurements for a snug fit, and remember to stagger the seams for added strength. Lay down your new panels, starting from one corner of the room and working your way out. Secure the panels using screws or nails, making sure they are flush with the surface. Using a level at this stage is crucial for ensuring that your new subfloor is even, as this will underpin the flooring installed on top.
Finishing Touches
After installing the subfloor, you may want to put down a layer of underlayment to provide insulation and additional moisture protection. Once everything is in place, seal the seams and gaps with an appropriate sealant to protect against moisture intrusion. Finally, check everything once more to ensure stability and evenness. This attention to detail will not only enhance the functionality of your trailer home but also contribute to its longevity.
Installing a new subfloor requires commitment and attention to detail, but the rewards are well worth the effort. With a solid foundation in place, you can confidently move on to the next steps in home improvement, all while embracing the unique advantages of trailer home living.
Sealing and Finishing Your Subfloor for Longevity
To achieve longevity in your trailer home’s subfloor, sealing and finishing are critical steps that significantly contribute to its durability and performance. After installing your new subfloor, a thorough sealing process can help protect against moisture, which is a common enemy of trailer homes due to their exposure to various conditions on the road and in different climates. Water intrusion can lead to rot, mold, and structural damage if not addressed properly.
Start by selecting the right materials. Waterproof sealants or water-resistant coatings are essential for preventing moisture from penetrating your new subfloor. Look for products specifically designed for use in mobile or manufactured homes, as these often provide superior protection against the unique challenges of mobile living. Before applying any sealant, ensure that the surface of the subfloor is clean, dry, and free from dust or debris, allowing for optimal adhesion.
Once you’ve prepared the surface, apply the sealant or coating evenly across the seams and gaps of the subfloor. Pay close attention to any areas where there may be potential water exposure, such as near sinks, bathrooms, or HVAC systems. Consider using a brush or roller for applied control, and always follow the manufacturer’s instructions regarding drying times and layering requirements to ensure a uniform finish. After the first coat dries, inspecting for any missed spots or thin areas can help guarantee that every part of your subfloor is adequately protected.
Additionally, consider adding a layer of underlayment before installing the final flooring. This not only provides an extra barrier against moisture but also enhances insulation and soundproofing, making your home feel more comfortable and energy-efficient. Options such as foam or felt underlayments can be cost-effective solutions that save on future expenses related to floor repairs or replacements.
Incorporating these sealing techniques not only extends the life of your new subfloor but also fortifies the overall structure of your trailer home. This can instill peace of mind while also elevating the home’s value, making it a worthwhile investment for current residents and prospective buyers alike. Keeping the subfloor in top condition is an essential aspect of maintaining a healthy, sustainable living environment, reinforcing that mobile home ownership can be both practical and rewarding.
Preventing Future Subfloor Issues: Best Practices
To prolong the lifespan of your trailer home’s subfloor and minimize costly repairs over time, a proactive approach to maintenance is essential. Regular inspections and immediate action at the first signs of wear can prevent minor issues from escalating into major problems. One effective strategy is to conduct quarterly checks throughout the year, focusing particularly on areas prone to moisture exposure, such as kitchens and bathrooms. Look for signs of discoloration, warping, or soft spots, which could indicate water damage.
Another best practice involves ensuring proper ventilation beneath your trailer. Adequate airflow can significantly mitigate moisture buildup, reducing the chances of mold and rot developing in the subfloor. If your trailer allows for access beneath it, consider installing vents or using dehumidifiers during particularly humid months. In addition, maintain the exterior of your trailer by ensuring that gutter systems are functioning properly and directing water away from the foundation. A well-maintained drainage system helps redirect rainwater and prevents it from pooling around the home, thereby reducing moisture ingress.
Furthermore, be wary of how heavy objects are placed in your trailer. Distributing weight evenly can prevent excessive strain on the subfloor, which is particularly crucial in areas with high foot traffic or heavy appliances. Consider using furniture pads to help distribute weight and avoid direct pressure on specific areas of the floor. Refurbishing the flooring or using area rugs can also provide not only aesthetic appeal but an additional layer of protection against wear and tear.
Additionally, employing a comprehensive sealing strategy will help in preventing future subfloor issues. Utilizing high-quality sealants around seams and joints creates a formidable barrier against water penetration. Keep the installation of these sealants as part of your home maintenance routine, reapplying them every few years as necessary. Taking these preventive measures ensures that your trailer home remains a safe, comfortable, and lasting living space, reinforcing its value as a practical housing option.
Cost Considerations for DIY Subfloor Replacement
Replacing the subfloor in a trailer home can be a cost-effective DIY project, but understanding the financial aspects is vital for a successful outcome. Typically, the expenses involved in a subfloor replacement project can be broken down into materials, tools, and additional considerations like disposal fees and unexpected repairs.
Material Costs
The primary expenditure for any subfloor replacement stems from the materials required. Options such as plywood, oriented strand board (OSB), or specialized subfloor panels each come with different price tags. On average, you can expect to pay between $15 to $30 per sheet for plywood or OSB. Keep in mind that the size of your trailer home will determine how many sheets you’ll need; a standard trailer may require anywhere from 10 to 20 sheets. Additionally, don’t forget to budget for screws, adhesive, and possibly a moisture barrier, which can add another $50 to $100 to your overall material costs.
Tool Expenses
If you’re considering a DIY approach, having the right tools is crucial, and this can also impact your budget. Essential tools may include:
- Reciprocating saw or circular saw: $50 to $150 if you don’t already own them
- Drill: $30 to $100
- Measuring tape and square: $10 to $30
- Safety gear: goggles, gloves, and mask may total around $20
If you already own these tools, your costs will be lower. Renting equipment might also be an option, especially for more specialized tools, which can save significant money if you don’t foresee future use.
Unexpected Expenses
No matter how well you plan, it’s wise to allocate a portion of your budget-around 10-20%-for unforeseen costs. Encountering mold, further damage, or additional repairs during the removal of the old subfloor is not uncommon. Ensuring that you’re prepared for these contingencies can help you manage stress throughout the project.
Labor Considerations
If you’re uncertain about tackling this project alone, hiring professionals is an alternative, but it comes with a higher cost. Labor rates can range significantly based on your location and the extent of work related to the subfloor replacement, typically costing between $50 to $100 per hour. In contrast, a DIY approach can reduce your costs considerably, allowing you to invest more into quality materials or additional enhancements.
Maintaining awareness of these cost aspects allows you to approach your subfloor replacement with confidence, understanding that a well-budgeted DIY project can result in significant savings while also enhancing the safety and longevity of your trailer home. Taking the time to plan financially ensures that you remain on course throughout your renovation journey.
When to Call a Professional: Signs You Need Help
When embarking on the task of replacing a subfloor in a trailer home, it’s essential to recognize your limits and know when to seek professional assistance. While many homeowners find satisfaction in tackling DIY projects, some situations demand expertise that goes beyond basic skills and tools. For instance, if you encounter extensive water damage or mold during your inspection, it may indicate underlying issues that require specialized treatment before replacement can even begin. Mold, in particular, can pose serious health risks, making this a critical area where professional help is advisable.
Another sign you might need a professional’s expertise is if you notice structural damage to the frame of your trailer home. If joists are warped, rotted, or corroded, the integrity of your flooring is compromised. Replacing a subfloor isn’t merely about swapping out panels; it’s about ensuring the entire support system is sound. Addressing these deeper structural problems requires not only specialized knowledge but also experience working with the unique construction of manufactured homes.
Complicated layouts can also necessitate the help of a seasoned contractor. Trailer homes often have intricate designs that can complicate a DIY replacement, especially if the layout includes multiple angles or requires cutting around fixtures like plumbing or electrical lines. A professional installer will have the tools and experience to navigate these challenges efficiently, minimizing the risk of mistakes that could lead to time-consuming and costly corrections.
Finally, if you find yourself feeling overwhelmed at any point during the process-from the planning stage to the physical labor of removal and replacement-don’t hesitate to call in a pro. Many contractors offer consultations that can guide you through your options, helping you make an informed decision that balances cost, efficiency, and the overall integrity of your home. Recognizing these signs not only helps maintain the quality of your trailer home but also protects your investment in the long run.
Maintenance Tips for a Healthy Trailer Home Subfloor
Maintaining the subfloor in your trailer home is not just about aesthetics; it’s a critical aspect of ensuring overall structural integrity and safety. Over time, moisture can accumulate from various sources such as leaks, humidity, or inadequate ventilation, leading to potential damage. Regular maintenance checks can prevent small issues from escalating into costly repairs. It’s essential to make routine inspections a part of your home care regimen.
One effective maintenance strategy involves keeping an eye on the areas around sinks, showers, and water heaters. These spots are particularly susceptible to leaks, which can gradually degrade the subflooring material. Make it a point to check for any signs of water damage, such as discoloration or soft spots, and address them promptly. Additionally, enhancing ventilation in your home can significantly help manage humidity levels. Consider installing exhaust fans in bathrooms and kitchens and regularly using dehumidifiers, especially in high-moisture periods.
Another key element to maintaining a healthy subfloor is ensuring that all insulation beneath the trailer is intact and not damp. Insulation serves as a barrier against moisture and promotes energy efficiency. When performing maintenance, inspect the underside of your trailer for any signs of mold or degradation in the insulation, and replace it if necessary. Proper grading around the trailer is also vital; it helps divert water away from the foundation, preventing pooling that could lead to water damage over time.
Lastly, establishing a routine of annual professional inspections can be invaluable. Engage a contractor who specializes in manufactured homes to conduct thorough assessments of your subfloor and related structures. This proactive approach not only extends the lifespan of your subflooring but also enhances your home’s value and safety, keeping your living space comfortable and secure. By incorporating these tips into your maintenance routine, you can ensure a healthy, durable subfloor that supports the integrity of your entire trailer home.
Upgrading Your Trailer Home’s Flooring: Beyond the Basics
Upgrading the flooring in your trailer home can dramatically enhance not only the aesthetic appeal but also the functionality of your living space. It’s an opportunity to transform your interior into a comfortable and stylish environment while ensuring that the subfloor is adequately protected from moisture and damage. As you embark on this upgrade, consider the following practical tips and insights that go beyond basic flooring installations.
Firstly, integrating modern materials can significantly improve the comfort and longevity of your flooring. For instance, moisture-resistant laminate or vinyl flooring can effectively prevent mold growth and withstand the rigors of mobile living, especially in humid climates. These materials are available in various designs, allowing you to achieve your desired look-from rustic wood finishes to sleek tiles-without sacrificing durability. When choosing your flooring, always think in terms of performance and maintenance, ensuring that you select options that align with your lifestyle and environmental conditions.
Maximizing Installation Efficiency
Proper preparation is key to a successful flooring upgrade. Start by thoroughly inspecting the existing subfloor for any signs of moisture damage or instability. If issues are detected, address them first by replacing the damaged areas or reinforcing the structure to ensure a solid foundation. Additionally, consider using underlayment materials to provide added cushioning, insulation, and soundproofing, which can make a noticeable difference in the overall feel of your home.
When installing the flooring, follow the manufacturer’s instructions closely but also remain flexible and resourceful. For example, in mobile homes where floors have slight undulations, employing a leveling compound before laying the new flooring can yield a smoother surface and reduce the risk of future warping. Also, keep in mind that proper expansion gaps are essential with certain materials like laminate; this allows for natural swelling and contracting due to temperature changes.
Maintaining Your Upgraded Floors
Once your new flooring is installed, maintaining its condition is just as crucial. Incorporate a cleaning regimen tailored to the materials used, ensuring that you use appropriate products that will not damage the finish. Regular sweeping and occasional mopping can help keep dust and excess moisture at bay. Additionally, placing mats at entry points can minimize dirt accumulation and protect the flooring from wear caused by foot traffic.
By approaching the flooring upgrade as not merely an aesthetic change but as a chance to bolster your trailer home’s resilience and efficiency, you can enjoy a space that is both beautiful and functional. Embracing the unique challenges of mobile home living with smart, informed choices ensures that your investment will stand the test of time, providing you with unparalleled comfort and peace of mind.
FAQ
Q: How do I know if my trailer home needs a subfloor replacement?
A: Signs that your trailer home may need a subfloor replacement include soft spots or sagging areas, visible water damage or discoloration, and squeaking or creaking noises when you walk on the floors. Regularly inspecting the subfloor can help catch problems early.
Q: What type of plywood is best for trailer home subfloors?
A: For trailer home subfloors, using CDX plywood or pressure-treated plywood is recommended. These options provide durability and moisture resistance, essential for longevity in varying climate conditions. Always check local building codes for compliance.
Q: Can I replace the subfloor in my trailer home without professional help?
A: Yes, many homeowners can replace the subfloor themselves if they have basic DIY skills. Ensure you have the right tools and follow a detailed step-by-step guide. However, if structural damage is extensive, consulting a professional is wise.
Q: How long does it take to replace a subfloor in a trailer home?
A: Replacing a subfloor in a trailer home typically takes 1-3 days, depending on the extent of damage and your experience level. Proper preparation and having the right materials on hand can speed up the process significantly.
Q: What are the costs associated with DIY subfloor replacement in a trailer home?
A: Costs for DIY subfloor replacement can range from $200 to $600, depending on materials, tools, and any additional repairs needed. Budget for plywood, screws, sealant, and other materials to ensure a successful project.
Q: Is it necessary to seal the subfloor after installation?
A: Yes, sealing the subfloor is crucial to prevent moisture damage and extend its lifespan. Use a high-quality sealant or waterproofing agent specifically designed for plywood to reduce the risk of rot and mold.
Q: What tools do I need for subfloor replacement in a trailer home?
A: Essential tools include a circular saw, pry bar, measuring tape, safety goggles, and a nail gun or hammer. Having a level is also beneficial to ensure the new subfloor is installed properly.
Q: How can I prevent future subfloor issues in my trailer home?
A: To prevent future subfloor issues, maintain proper ventilation to reduce moisture buildup, regularly inspect for leaks, and ensure that gutters and downspouts direct water away from the foundation. Regular upkeep can significantly extend the life of your subfloor.
Wrapping Up
By following the steps outlined in this guide on how to replace the subfloor in your trailer home, you’ll not only enhance the durability of your living space but also gain valuable DIY skills. Remember, tackling home repairs can seem daunting, but with the right resources and determination, you can achieve impressive results. Don’t wait to start your home improvement journey-take the first step today!
For more insights, check out our related articles on mobile home renovation techniques and maintenance tips to keep your home in top shape. If you’re curious about financing your next project, our guide on budget-friendly home improvements can also offer valuable tips. We invite you to share your experiences or questions in the comments below, and be sure to subscribe to our newsletter for the latest updates and expert advice on mobile home living. Your journey towards a beautiful and functional trailer home begins now!